Can You Paint Wet Wood? The Complete Guide to Painting Damp Lumber
Ever looked at a piece of damp wood and thought, “Why wait? Can’t I just paint this now?” We’ve all been there, itching to dive into a DIY project, yet held back by a piece of lumber wetter than a Seattle winter.
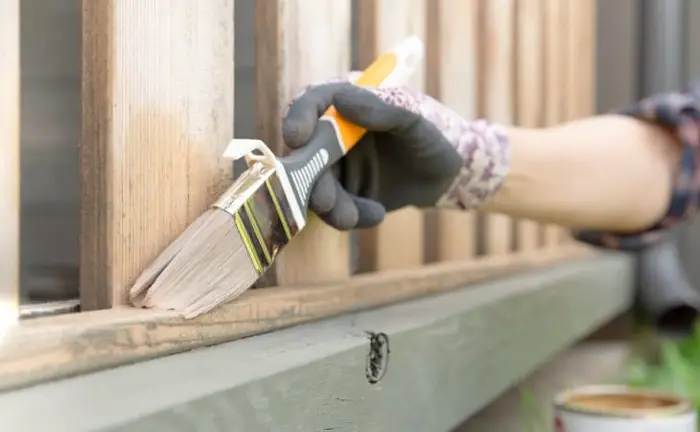
But in reality, can you paint on wet wood?” The quick answer is no. It’s generally not a good idea to paint wet wood. But some ways can help you in this situation.
In this complete guide, we’ll dig into why it’s usually a bad idea and what could go wrong if you do it. We will also talk about some potential workarounds where waiting for the wood to dry isn’t an option. Intrigued? Keep reading!
Can You Paint Wet Wood?
Alright, so you decided to say, “Forget it! I’m painting this piece of wood whether it’s wet or not.” Do you know what’s the worst that can happen?
Please check the following consequences before you go painting wet wood.
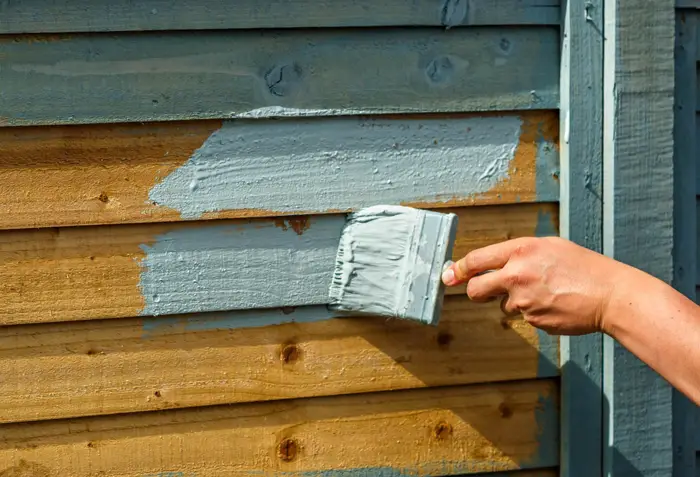
Peeling: The Battle of Poor Adhesion
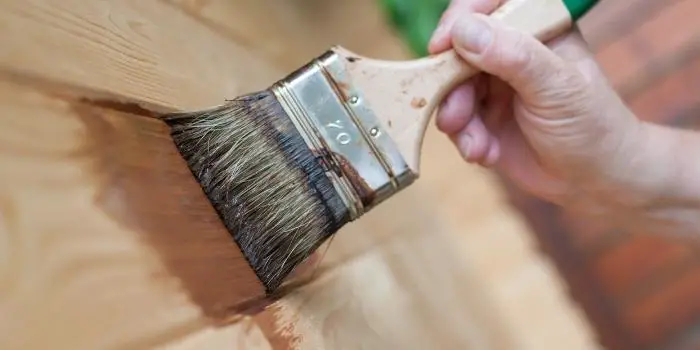
Picture this: you’ve painstakingly applied the first coat of paint to your damp wood, and it looks decent for the moment. However, this is just the calm before the storm. Paint requires a firm grip on the surface to maintain its integrity, and wet wood isn’t exactly the ideal canvas.
The moisture on the surface hinders proper adhesion. As a result, that fresh coat of paint may seem fine initially, but it’s just biding its time. Sooner or later, it’s going to throw in the towel and start peeling off in unsightly strips, leaving you with a patchy, unappealing finish.
You’ll be left with the daunting task of scraping off the remnants and starting over.
Cracking: When Uneven Drying Takes Its Toll
Painting wet wood is like walking on thin ice—it might seem fine until you realize it isn’t. Uneven drying is the culprit here. As the wood underneath slowly dries, it contracts and changes shape.
Meanwhile, the paint on top is drying at a different pace, causing it to become rigid and inflexible. The result? Cracks. Your once-smooth and flawless paint job will soon be marred by unsightly fractures running through the surface, making your project look like a weathered relic rather than a polished masterpiece.
Blistering: When Moisture Tries to Escape
Imagine this scenario: you’ve applied paint to your wet wood, and all seems well at first. But as the paint starts to dry, trapped moisture within the wood attempts to escape. The result is the formation of bubbles or blisters beneath the paint.
These unsightly bulges not only ruin the aesthetics of your project but also weaken the overall structure. Over time, these blisters can rupture, leaving your once-smooth surface marred with craters and imperfections.
When Can You Actually Paint Wet Wood?
Sometimes you can’t wait. Maybe the weather’s not cooperating, or you have a deadline to meet. Thankfully, there are some points where painting wet wood is not that bad at all.
Specific Paints for Wet Wood
There are paints formulated to work on damp wood. These paints contain additives that allow for better adhesion and faster drying times, even on a wet surface. Latex paint is the most common one out there. Avoid paint that is water soluble.
Ideal Conditions
If you’re working in a well-ventilated area with low humidity levels, your paint and wood might dry more quickly than you’d expect.
How to Dry Wood Before Painting?
If you have some time on your hands, drying the wood is the best route. Here’s how:
Natural Drying
Just let the wood sit in a dry area. Nature will do its thing, but it might take a while.
Use of Fans and Heaters
Keep the painted wood directly under your fan or heater. Speed up the process with some forced air or heat. Just be careful not to go overboard, as you might cause the wood to crack.
Wood Drying Chemicals
There are chemicals for this, too, such as urea and sodium nitrate. They can be applied to the wood to expedite the drying process.
How to Test Wood Moisture Levels?
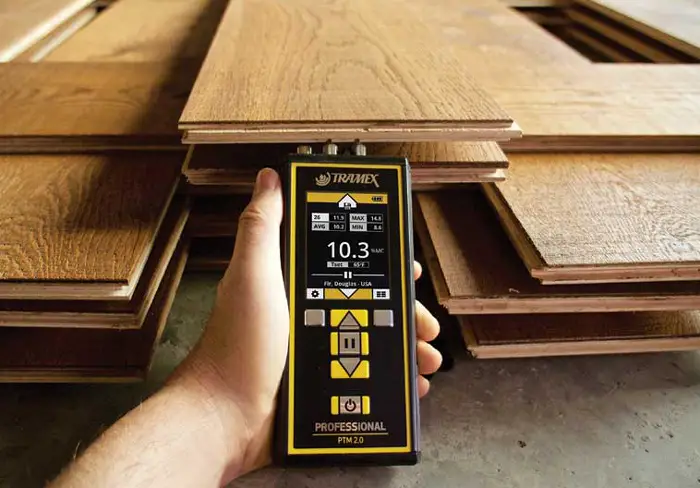
A moisture meter is one of the most precise and efficient ways to measure wood moisture levels. These nifty gadgets are like your trusty sidekicks in the battle against dampness. Here’s how you should proceed.
- Prep Your Wood: First, ensure your wood is prepared for testing. It should be clean, dry on the surface, and free from any loose debris or paint.
- Select the Right Type: Depending on the type of wood you’re dealing with, you may need to choose a moisture meter calibrated for that specific wood species. These meters take into account the natural variations in wood density, providing more accurate readings. You can use the Wagner moisture meter to select the right type of wood.
- Poke and Read: Insert the moisture meter’s probes or pins into the wood’s surface. Make sure the pins penetrate deep enough to reach the core moisture levels. Some moisture meters have settings for different depths, so adjust accordingly.
- Take Multiple Readings: For an accurate assessment, take readings at various points on the wood, especially in areas where moisture might accumulate, like near knots or end grain. This will provide a comprehensive picture of the wood’s moisture content.
- Read and Record: The moisture meter will display a reading, typically as a percentage. Note down these readings and compare them to the recommended moisture content levels for your specific wood species.
According to Wagner Moisture Meters, interior wood should be 6% to 8%, while exterior wood should be 9% to 14%. If the readings are higher than they should be, it’s a clear sign that the wood is too wet for painting.
The Press Test: A Low-Tech Alternative
Not everyone has a moisture meter on hand, and that’s where the press test comes into play. It’s a simple, low-tech method to gauge wood moisture levels:
- Grab a Cloth: Take a clean, dry cloth (like a paper towel) and press it firmly against the wood’s surface.
- Observe: If the cloth comes away damp or leaves behind moisture spots on the wood, it’s a clear indicator that the wood is still too wet for painting. The moisture seeps through the cloth, telling you that the wood needs more time to dry.
- Repeat if Necessary: For a more accurate reading, you can perform this test at various spots on the wood, especially in different areas of the board.
FAQs
Here are some of the most asked questions about whether you can paint wet wood or not.
Q: Should wood be completely dry before painting?
Natural wood, which may hold a lot of moisture depending on storage and exposure, should have no more than 19% moisture content before being painted. When in doubt, use a moisture meter to check many spots.
Q: Can you dry wood in a day?
High-temperature commercial kilns may dry hundreds of board feet of timber in a single day. Hardwoods may be dried in this manner, but only a select few species.
Q: Can you dry wood with a hair dryer?
Using electrical appliances like hair dryers is not only wasteful but also very risky. The air may carry moisture away even at relative humidity close to 100%.
Conclusion
So there you have it. The answer to your question is, can you paint wet wood? While painting wet wood is generally not recommended due to poor adhesion, longer drying times, and potential wood damage, there are instances where you can get away with it—provided you take certain precautions.
However, there are certain situations where you may not have the luxury of waiting for the wood to dry completely. In such cases, using specially formulated paints designed for wet or damp wood can be an effective solution.