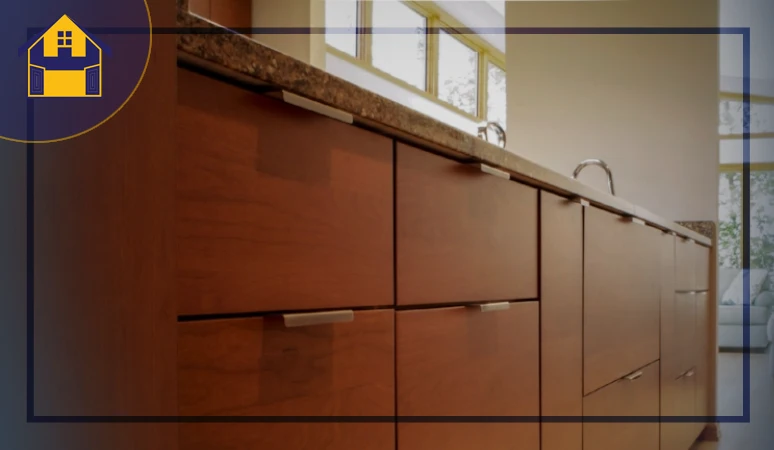
How to Measure for Full Overlay Cabinet Doors?
A full overlay cabinet door will over almost everything when it is closed. As you cannot see the cabinet box or the face frame when the door of the cabinet is closed, this looks aesthetic. If you have 80s partial overlay cabinet doors, you can check out how to measure for full overlay cabinet doors and replace them! What else is more fun than these new cabinets?
The Overlay of Cabinet Doors
The overlay of a cabinet door refers to the amount of the door that overlaps on the hinge side. To measure the overlay, all you require is to measure the width of the door first. Once you are done, you have to move to subtract the width of the opening and then divide the result in half.
Step by Step Measuring Full Overlay Cabinet Doors
So, here goes the steps on how do you size a full overlay cabinet door an aesthetic outlook- it’s a game-changer for the room’s appearance!
Step 1: Deciding the Overlay
Before you plan on measuring the overlay of your cabinet door, you have to decide which overlay you are planning to get. There are two different methods of measuring the door fronts.
The drawer fronts will lay on the front part of your cabinet in two different manners- either Partial Overlay which is also known as ½-inch Overlay and the other is the Full Overlay or 1-1/4-inches Overlay. As we are going to talk about the full overlay cabinet doors here, you must know that it is a modern style these days.
Step 2: Remove the Previous Doors
Once you have decided that you want to add new cabinet doors, you have to get rid of the previous one. In the case of the full overlay, almost the whole cabinet face is blocked with the door. And so, the previous doors aren’t going to help you anyway!
Get a screwdriver and work on removing the old doors. Carefully, loosen and unscrew the old doors and get rid of all of them. These are only a reminder of the 80s and 90s now! And the cabinet face is free to add new doors. Don’t forget to have a look at the best cabinet drawer slides for the interior too!
Step 3: Make a Spreadsheet
If you want to change the door only, settle for this method. However, you can also go through the best floating shelf brackets, this will not only change the look but also make everything more comfortable for you!
So, you are done with the old cabinet doors now. It’s time to add the new one. But before adding, measuring the door is necessary.
But before you start the measurement, keep in mind that you need to record all the measurements otherwise, you are going to forget it. Take a paper and make a spreadsheet so that you can note everything accordingly.
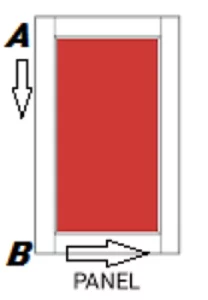
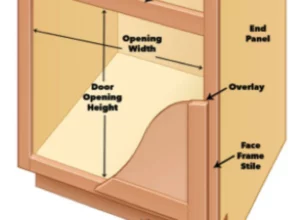
Step 4: Measure the Opening Panel
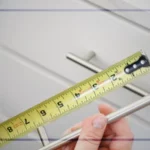
Now, you are all ready to get the measurement. Get a hold of a tape measure for the measuring. All you need now is to measure the opening panel. It’s amazing if you draw a cabinet face (rectangle or a square) on the paper and there, you can write down the measurements.
Here, we will tell you how to measure the width and height. Make sure that you are only measuring the height and width of the openings. It is from the hole in the face of your cabinet. You have to measure from the inside edge of the face frame.
Imagine that the opening’s height A is 10 inches and the width B is 5 inches. One by one, measure the height and width of the openings of all the cabinets.
- A: 10-Inch
- B: 5-Inch
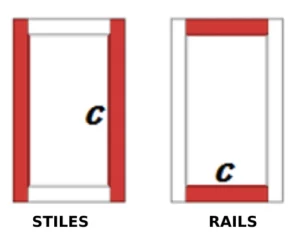
Step 5: Measure the Stiles and Rails
Once you are down with the measurement of the opening, you have to get your hands on the stiles and rails. Here, the width of the stiles and rails matter a lot. Some of the new woodworkers might not know what stiles and rails are, we will discuss it briefly.
Both of these are part of the face frame. The part of the face frame that runs vertically is called the stiles. On the contrary, the one that runs horizontally is called the rails. Let’s imagine that the stile and rail width C 2 ¼-inch in this case.
- C: 2¼-Inch
Record this information in the paper and then move to the next step to learn about the right size of the cabinet door.
Step 6: Measure Clearance
Here, we will be working with the size of the cabinet doors. As we are settling for the full overlay cabinet doors, you are planning to cover as much of the face frame of the cabinet as possible. It will provide a neat look.
However, when it comes to doors that cover almost the full face frame, there’s a chance of overlapping cabinet doors. In some cases when you keep little space in between the doors, there’s a chance of the doors rubbing each other or scratching too.
And this is why it’s necessary to keep a specific amount of gap between the doors. In the full overlay settings, we recommend you provide a ¼-inch gap between the doors. This is called full overlay cabinet door clearance; let’s name it as D. It will certify that the doors can be opened and closed without any obstacle.
- Full Overlay Cabinet Door Clearance D: ¼-Inch
Step 7: Measuring the Covering Area
In this step, you have to take the width of the rail in the center or middle of your cabinet first. The cabinet we have mentioned above is has a rail width of C 2 ¼-inches. And now, you have to subtract the gap you need for the opening and closing the door from the rail width. In short, subtract D from C.
- D – C = 2 ¼ – ¼ inches = 2 inches
So, from here, we get 2 inches of rail with you can cover with the cabinet doors. Let’s name this E.
Step 8: Measuring the Overlay
Now, you have to think about the door front that will be covering the top and the bottom portion. Yes, there will be a door or drawer front that will cover the top part of the rail.
On the other hand, there can be a drawer or door from at the bottom part that will cover the bottom portion of the rail too! And this is why you have to divide E by 2.
- E/2= 2/2 = 1 inch
An, you already got the number! Here, this 1-inch is the measurement of how much the door front will overlay the face frame of your cabinet surrounding the openings. Let’s name it as F. F is the overlay of your cabinet!
Step 9: The Final Measurement
The opening width was B and the overlay was F, let’s add them to know the final measurement of the door.
- B + F = 5 + 1 = 6 inches
So, the width of the door will be 6 inches. In case you want two different doors, all you need is to divide 6 inches into two divisions and that’s all. And once you get the right measurement, check out how to measure and install drawer pulls and install them by yourself!
Note: Keep in mind that you only need to subtract ¼-inches from the width and add the overlay. In the case of the height, you can simply add the overlay with the height without subtracting this amount.
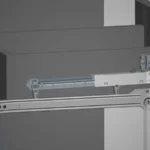
Hinge Details
However, when you pick up the full overlay settings for your cabinet, you have to take a look at the hinge too. For the full overlay designs, you can settle for the full and partial wraparound or the flush mount hinge.
Also, you can settle for the surface mount or full overlay European hinge too. Keep in mind that the size of the hinge also matters here.
Also Read: Best Soft Close Cabinet Hinges | Top Picks & Reviews
Wrap Up
We often get confused that if we try to order for the full overlay cabinet, there’s a chance of the doors overlapping or rubbing each other. The reason behind this problem is the wrong measurement. Well, we have covered it all for you!