How to Mortise a Door Hinge with a Router? (Step-by-Step)
To protect the room, you surely need to add locks to the door. Along with this, to open and close it, mortising is necessary for adding a mechanism to the door. No matter what the reason is, you must know how to mortise a door hinge because you have to pay a lot to the professionals for the job. When you will know how to mortise a door hinge with a router in easy steps, you won’t need to waste your cash anymore!
Step by Step Mortising Door Hinge with Router
We know you are worried about how to mortise hinges with a router! You need a jig for the process and that’s all! Be cautious and you can complete it all!
Step 1: Prepare the Gears
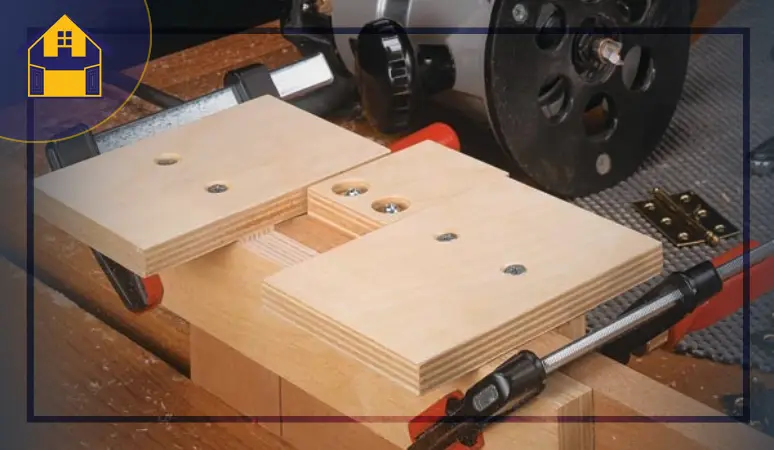
Yes, you can always plan on mortising a door hinge with your hands. In that case, you will require a hammer along with a utility knife. Also, you will need a sharp wood chisel. But with a router, mortising a door hinge is easier than ever! Check out the ideal router for door hinges first. As you already know, you will need a router as a powerful tool for the job; you will only need one other tool. A hinge mortising jig with the router will be enough for the work. The jig is kept clamped to the door. The work of the jig is to guide the router through the mortise cut! We recommend this method when you have a lot of mortises to cut. And if you already have a jig, the process gets more effortless. If you don’t have one, you can buy one too. These are very inexpensive and do their job pretty quickly. It is a rectangular frame and it will slip over the edge of your door. For securing, there is a clamp involved in the process. However, different models of the jig will have a different setup. Oh well, we don’t need to mention that you can find the best cabinet hinges here, right?
Step 2:
We are done with the gears and now we will discuss the major part of how to use a router to mortise door hinges! As we said before, different jig models will have a different setup. However, here, we will tell you about setting up the jig for the work.
- For this process, adjusting the mortising jig is a must. Get it adjusted to the proper hinge size. Also, keep in mind that you have to adjust it to the proper door thickness. Once you are done, you have to install or take off the corner inserts. No matter what the used inserts are, jigs are capable of cutting mortise both squared corners and the rounded ones.
- However, if you are dealing with the squared corners, you will surely need a chisel later. This will provide you with a perfectly finished product. Get your hands on the jig now. Take it to the edge of the door you have selected.
- Check the desired hinge location first and take the jig there. Right there, all you need to do is secure it. Different manufacture will suggest you differently. Whatever the method of securing it is, secure it and make sure it is tight and firm.
- An amazing way to fix the right place of the hinge attachment is to drill some pilot holes. These holes are temporary and will help you decide the right place. With these holes, you can mount the hinge to the door temporarily. Here, you have to use the screws. If you want to get perfectly centered holes, you will need a self-centering piloting bit. After the scoring is done, take off the screws and you are ready!
Step 3:
As you have already decided to use a router for the job, get the right router bit for cabinet. For the newbie, we would like to mention that not all router bits will be fit for the job. Instead, you will need piloted router bit.
Yes, with the mortising jigs, only piloted router but will help you do this job. These bits include a guide bearing. Piloted router bit might be flush-cutting or in other cases, it can be mortising type. With the bit, many jigs will be included.
It’s time to set up the router bit for the mortising job. First of all, get your hands on the bit and chuck it in the router. Your job here is to set the bit depth carefully. The bit depth must be matching the thickness of the hinge leaf. Be extra cautious about the depth here.
Some of the jigs that you see will also include two depth gauges. These are great for two standard hinge thicknesses. Well, now that the router bit is ready, it’s time to move to the next step.
Step 4:
You are ready to set the router onto the jig now. Do it but in this case, you have to be careful once again.
- The bit should not contact the wood! Set the router in a way ensuring that the bit is away from the wood. Here, you have to turn the router on. And then, rout the mortise. After you have turned on the router and started the mortising process, you have to go ahead in a clockwise motion.
- Certify that when you start, start along the perimeter. Now, just like we have mentioned, you have to go ahead in a clockwise motion. Here, you must take off the remaining material in the mortise. To do this, you must settle for front-to-back cuts in a repeated motion.
- Also, you have to go for right-to-left cuts in a repetitive motion. As you are cutting, there will be a waste. But this little trick will help you clear out all the waste that you have created. In this case, when you are working, always keep in mind that the bottom of the mortise is perfectly flat. Also, it needs to be smooth too!
Step 5:
It’s time to get your hands on the corners now. At times, the hinge might have square corners. For the square-cornered hinges, it’s amazing to go for a chisel along with a hammer so that you can easily square off all the corners.
- For doing this job, first of all, get your hands on the chisel first. All you need is to hold it. But be careful as you need to hold it vertically. When you hold it, certify that the beveled side of the chisel is set on the mortise interior.
- Once it faces the interior of the mortise, it’s time to use your hammer and tap it! Carefully, tap the chisel. Use the hands to tap it with the hammer so that you can cut one side of the corner. Once you are done with cutting one side of the corner, it’s time to move to the other side.
- Repeat the same process by positioning the chisel on the interior of the mortise and keep tapping it with the hammer. After a while, you will see that the other side of the corner is done.
- Once both of the corners are done, move to cut out the waste. So, how can you do it? Well, for this, you have to take the chisel and hold it at a lower angle.
- Here, again, you have to take care of the beveled side of the chisel. However, in this step, you don’t need to keep it in the interior part. Instead, you must position the chisel in a way that the beveled side is facing up!
- Now, all you need is to energize and then push the chisel with the help of your hand. In this way, you can cut out the waste! So, you are done with mortising the door hinge with a router!
Wrap Up
Some people love mortising door hinges by hand. Well, you can do it too! If you don’t have a router and a jig, you can plan on doing that. But if you want to reduce the waste of time and make proper use of your energy, the best thing you can pick up is a router and a jig for the door hinge! Try it out.