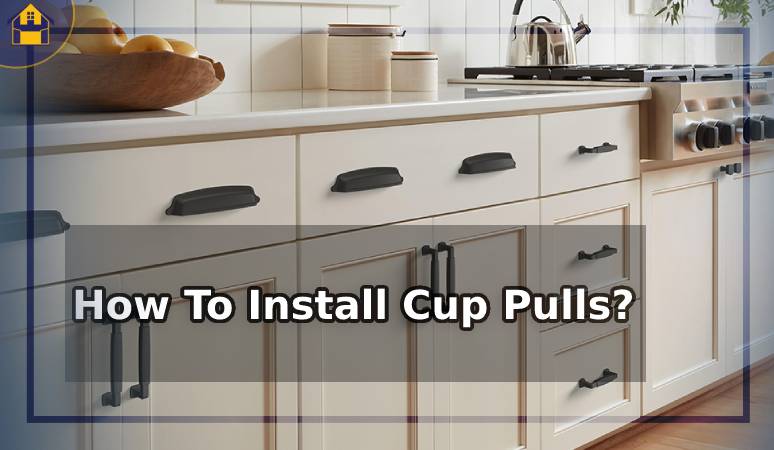
How To Install Cup Pulls?
Installing cup pulls might look intimidating at first compared to other cabinet hardware like knobs. Perhaps because of their small size and the fact that so much precision is required. So, then, what is the procedure for installing these pulls?
Well, how to install cup pulls is simple. The first thing to do is remove the existing hardware using a screwdriver. Then, proceed to determine where to place the pulls on the cabinet door. Lastly, use a drill and drill bit to make the right size holes where the pull handles will go right in.
But why install cup pulls in the first place, and where is the best place to install them? Below are answers to these questions and a step-by-step guide on installing the pulls.

Why Install Cup Pulls
You probably are wondering, why install cup pulls and not knobs, tab pulls, or latches? Let’s find out.
Unique vintage style
Cup pulls have a more vintage feel, making them excellent for traditional and contemporary kitchen styles. Their stunning look gives even the most modern drawers a vintage touch.
Won’t pull on clothing
With most handle types like knobs and bars, your clothes are more likely to get stuck there. But with cup pulls, you don’t have to worry about ever snagging your clothing on them.
Available in a variety of colors and styles
The best cup pulls come in a wide range of styles and finishes, including matte and shiny brushed nickel. Therefore, finding a style that complements your doors should be easy.
Easy to use and install
Cup pulls’ round design allows for easy opening and closing of your drawers. Simply put, these handles are easy to grab hold of. Even better, you will find the handles easy to install in minutes.
Where to Install Cup Pulls
You can’t install these handles on just any type of door. So, where should cup pulls be placed? Read on to find out.
Cabinet doors
Thanks to their timelessness, cup pulls will look good on any drawer or shaker cabinet door. The draws easily blend with any cabinet door design, from transitional to modern style.
Drawers
Another place you can choose to install the cup pulls is on the drawers. The pulls will create a clean and high-touch finishing look for your drawers.
What Tools Will You Need
Before we look at how to install cup pulls on closet doors, let’s find out what tools you will need.
Hardware (cup pulls) and screws
You need the best and correct size cup pulls that match your drawer or cabinet door style. Make sure the pulls are high-quality and come with mounting screws.
Drill and drill bit
Additionally, you will need a drill for making mounting holes. The important thing is choosing the right size drill bit for your screws.
Paper or piece of cardboard
If you don’t want to use a ready-made template, you can use a piece of cardboard or paper to make one yourself.
· Pencil and screwdriver
A pencil is for marking where you will install the pulls. As for the screwdriver, you use it to uninstall the previous hardware or when tightening the pulls’ screws. A carpenter pencil is the best choice.
How to Install Cup Pulls
So, how do you install cup pull handles? Below is a step-by-step guide on installing your cup pulls.
Step 1: Remove previous hardware
If you are replacing knobs or other handles with cup pulls, use a screwdriver to first remove the hardware. Then, you can install the pulls on the holes where the knobs were.
Step 2: Construct a template
While you could buy a premade template, you can also make one yourself. Simply get your piece of cardboard or paper and cut it down based on the exact dimensions of your cabinet or drawer.
Step 3: Determine where to place the cup pulls
Grab your template and align it with your drawer door. The top of the template should be perfectly aligned with the top of the cabinet. Next, locate the center of the paper or cardboard template and mark the spot with a pencil.
After that, measure the distance between the center and the edge of your drawer door. The figure you get, divide by two to determine where each pull will go, and mark the spots with a pencil. Typically, cup pulls on shaker cabinets are installed halfway between the center and edge of the stile.
Step 4: Drill holes
Grab your drill and drill bits and make holes at the exact places you marked in step 3. The size of holes you make depends on what size pulls for shaker cabinets you have.
Also worth mentioning is that you can drill the holes from either the inside or outside your drawer. This depends on whether the screws are designed to go in from the front or back.
Step 5: Screw in your cup pulls
Once you have drilled the holes, position your drawer cup pulls at the position of the holes. Then, place the mounting screws through your pulls and use a screwdriver to tighten the hardware.
Final Words
Installing cup pulls has many advantages compared to other types of handles. For instance, unlike knobs, they don’t pull on clothing. Even better, these pulls are durable and easy to maintain. On top of that, you can find them in various designs to match both modern and traditional door styles. The best part is that these pull handles are easy to install in minutes. So, any DIY enthusiast can install them. You just need to have the right tools. More importantly, you must know where to place the cup pulls.


