How to Install Soft-Close Drawer Slides | Step-by-Step
 We all know installing soft-close drawer slides can be a bit annoying to you! The process is nonetheless tricky and you might get caught in! Yes, it is always better to call for a professional to save your time and energy! But when you can do it on your own, you don’t need the experts anymore!
Today, we will tell you the process of how to install soft-close drawer slides in a proper manner! Let us check it out and work with it!
Step by Step Installing Soft-Close Drawer Slides
Get your screws, drills, and cabinet pulls ready because here, we will tell you the step by step guide to install soft-close drawer slides! Have a look!
Step 1: Collecting the Equipment
If you plan to install soft-close drawer slides, firstly, you have to get the drawer slides ready. For this process, firstly, get your hands on soft-close side-mount drawer slides. Once you get the drawer glides, you should start searching for the perfect mounting plates.
On the other hand, for the proper installing, you have to drill holes. In this case, drills are necessary for you. Also, get your hands on tape measure for measuring the right length and for marking, get a pencil. For adjusting the screws, you will need a screwdriver in this situation. Get ready with the equipment and start the process of installing the soft-close drawer slides.
Step 2: Removing the Hardware
In the process of installing the soft-close drawers, you must ensure that the drawers are removed properly when you start working. First of all, you have to get your hands on the drawers and empty the drawer. After this, take out the drawer from inside the cabinet. After taking off the drawer, you have to go through the hardware along with the cabinet hinges of your drawer slide.
Take off the screw that is holding the drawer. After taking off the screw, you have to go through the other screws of the drawer. Also, check the screws of your cabinet and unscrew them. All you need to do is getting rid of the screws and other hardware of the drawer slide.
Step 3:
Now that you are free from the screws of your drawer slides, you have to check for installing the drawer glides here. Take the drawer on your hand and position it on its side. Here, you have to go through the bottom of the drawer and ensure the proper alignment. First of all, go through the glide flush and slide it. Make sure it is properly aligned with the bottom of your drawer.
In this position, have a closer look at the front of the drawer. You have to ensure that the slight extending part of the glide is placed at the front part of the drawer. Now, take the pencil in your hand and start marking the placement with it. Once you are done with the marking process, you have to screw the glide that you have marked in the right place.
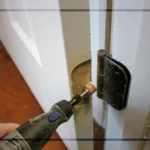
In this case, you might require some drilled holes. At times, there are predrilled holes. In some situations, you won’t get predrilled holes. So, you have to get your hands on your drill bits and make proper drill holes in the places you need. Don’t forget to repeat this at the rear. Now, take your drawer and flip it. After flipping, you will need to run the same process there too! All you need to do here is repeat the same thing!
Step 3: Install the Glides
The next step in the process of installing the soft-close drawer slides is the go through the cabinet glides. Yes, now, you have to start with installing the cabinet hardware with care. In this process, you will see that pulling the glide back is necessary.
This ensures that the clip is released. First, get your hands on the glide and pull it back on the drawer. After this, the clip will be released. Now, you have to remove part of it from your drawer carefully. In this position, you have to search for the mounting clips. Start attaching the mounting clips with the glide.
Along with this, you have to add the mounting clips with the front face frame clip too. After, you must get your hands on the back of your cabinet box clip and add the mounting clips there too. So, this step is all about the mounting clips, make sure you add them carefully so that you don’t need to suffer later.
Step 4:
Now that you are done with the mounting clips, you have to put emphasis on the frame clips. Get your hands on the face frame clip first. All you have to do is add them to the cabinet. In this case, you will surely require screws. And to add the screws, you will need screwdriver too.
While adding the face frame clip with the cabinet, you might require predrilling holes. Get the drill machine on your hand, get the right drill bit and start drilling the holes you need for the right adjustment of the face frame clip with the cabinet. Once you are done with it, you have to go through the back mounting clip and work with that.
Check the back of the cabinet box and add the back mounting clip there to keep it perfect. Once you are done, you have to screw it there. However, before screwing, you must make sure that it is properly leveled to provide the right alignment.
Step 5: Adjust it
Once you have added all the clips you need for adding the drawer slides, you have to go through the adjustment and make them perfect. First of all, check the distance of the drawer glide. You have to check both the front of the box and the back of the box. In this case, the both front and the back should be parallel. Check and recheck it and certify that they are in the right alignment.
After this, you have to check for the screws. In this step, you have to make required screw adjustments that hold the drawer with the cabinet. Even after adding the screws, you might need to adjust them a bit. Check if you need the same here or not and work accordingly. Go for the both sides and make the screw adjustment ideal for you.
Now, get your hands on the drawer and slide it inside the glide. All you have to do is certify that you it fits ideally without any complications! After ensuring this, you have to go through the final adjustments of the drawers. Once you are done with the final adjustments, you have to get the other screws required for the grip and add all of them. Use a screwdriver for adjusting the screws and you are done!
Wrap Up
So, you have checked out the process of installing soft-close drawer slides without any professional help! Now, you don’t need to call them and pay them anymore! You can do it yourself! Check the steps and try it at home!
Check out our site to learn more about installing cabinets, drawers, doors, and other necessary home improvement! It is always better to do it yourself, isn’t it?