How To Install A Barn Door Over Existing Trim?
Barn doors have a track record of adding charm and aesthetic value to any setting. They come in various materials to help people choose whatever sits best with their taste.
Selecting and installing a perfect barn door looks simple, but it comes with several considerations.

With many DIY door projects at the disposal of homeowners, even selecting the right rail system can be challenging. There is also a lot of measuring to do, so one has to get braced for an engaging task.
This piece addresses everything pertaining to proper installation of barn door installation over the trim.
How To Install A Barn Door Over Existing Trim?
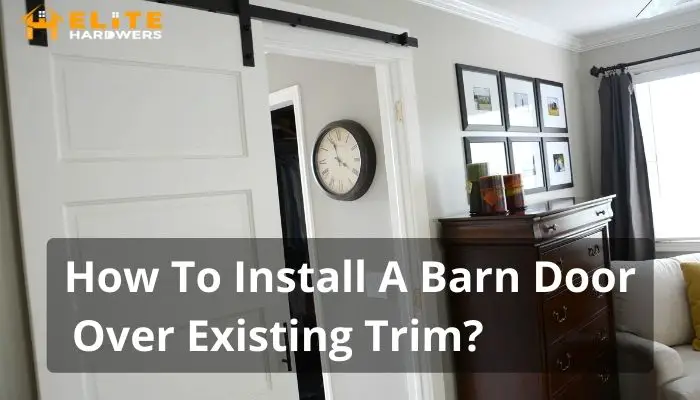
Can a barn door be installed over trim? Yes, quite safely and conveniently. Installing a door without removing the trim is always the best idea. You won’t have a lot of work to do, plus it looks beautiful when done properly. Below is a step-by-step procedure on how to do it.

- Pull out the current door plus its hinges and other hardware
- Assemble the barn door if it’s not ready to install
- Infuse the holes previously occupied by the hinges of the former door with spackle, then sand and brush it up with paint
- Use wall bolts to attach a header board above the existing door frame and touch it up with the paint of your choice
- Fix the rail onto the wall and firmly secure the sliding track
- Hang the sliding barn door on the track
- Fix the soft close on each side of the track to minimize the slamming
Most, if not all, of the components we have listed above are necessary. Like, someone may ask- does a barn door require a header? Barn doors need a header to carry the door weight. You may need to avoid MDF and other synthesized materials because they’re generally weak.
At this point, you should be good, but the door may generate a lot of noise. Installing a damper is the best way to address this issue. If you don’t know how to fix a soft close barn door, below are the simple steps to follow.
- Fix the soft stop onto the provided bracket- the holes are drilled and labeled
- Now take your soft stop (with brackets attached) and attach it to the barn door track
- Secure the track onto a ribbon strip or onto the wall before fixing the trigger on top of the door
- Test the door for slamming, and voila!
You’re probably charged to go for a barn door after reading this. Some people always wonder and ask – can I use my existing door as a barn door? The good news is that you can do this, but with the help of a professional.
How Much Bigger Should A Barn Door Be Than The Opening?
Although the barn door design is solely about your preference, you’ve to take note of the dimensions. As you explore the barn door trim ideas, consider the measurements for a convenient opening. Thankfully, barn doors come in different sizes.
For this reason, it’s impossible to give a specific figure that the opening should measure. The general principle, though, is that there should be a 1 to 2 inches overlay on either side. It gives the best results for rooms that require limited privacy.
If the opening allowance is 30 inches, you’ll have to buy a barn door measuring 32 inches. For rooms where you may need greater privacy, like bedrooms, the overlay should be 3 to 4 inches. Wider doors minimize the amount of light and sound that penetrates the room.
How To Update Door Casing After Installing A Barn Door?
After installing your barn door, you may need to enhance your door casing. Remember, we said you don’t have to dislodge the barn door trim to install the barn door. Follow the below steps to achieve great results.

- Use a square to measure a 90 degrees angle on each corner and mark where the trim should sit
- Chalk up along the margins of the casing with a utility knife
- Pry the trim away from the wall using a putty knife and a hammer
- Scrap off any paint chunks that may be holding onto the wall
- Use drywall mastic on any damaged parts (you may not need it if the wall is in good shape)
- Attach your new casing to the wall
- Seal the line where the barn door casing meets the wall and smooth it
- Touch it up with paint for a perfect finish
Things To Consider When Installing Barn Door Over Existing Trim
Barn door installation is a brilliant idea, but it’s no mean feat. Prior preparation is necessary, especially if it’s a DIY project. Below are the essentials to observe while at it.
Proper Measurements
Deciding the right place for the overhead track requires proper planning because of spacing. The experts advise that it should be 1.75 inches above the door. This allows a 0.5-inch space at the base, which is essential for flawless door movement.

Ideal Door Size
When choosing a barn door, consider one whose diameter will allow extension to each side of the entrance. Also, consider how far it extends past the entrance’s length, depending on the extent of privacy you need. This has everything to do with the barn door trim, as said above.
Flattened Floor and Ceiling
Both the floor and the ceiling must be adequately flattened for the door to slide along them seamlessly. If not, the installation will be difficult. For an unleveled floor, you will have to cut the bottom trim for the door to roll conveniently.
Final Words
Installing sliding barn doors over existing trim is a prudent way to revamp your home while saving up on space. You can construct yours from scratch or purchase it from a reliable dealer in the market. Of course, designing one requires you to have quality materials and, most importantly, the skill. Whichever path you take, remember to observe all the details above.
Taking home the wrong door size can be frustrating and wasteful. Whether you will customize or buy, take your time to record all the measurements. Both ways can be expensive or affordable depending on how careful you are with the materials.


