How to Install Drawer on Face Frame Cabinets?
If you have always used frameless cabinets, this is troublesome for you to get drawers on your new face frame cabinet. If you still don’t know how to install drawer on face frame cabinets, we are here at your aid!
From the measurement to the drilling, here, you must be a little more patient. There are a lot of methods for the installation. But here, we will keep the method very simple. If you are newbie, you can enjoy setting up the slides, trust us!

Step by Step Installing Drawer Slides on Face Frame Cabinets
Get your mounting brackets and the cabinet hinges ready because today, we will tell you how you can install face frame cabinet’s drawer slides in the easiest manner possible! These seven steps will help you install the drawers effortlessly! Let’s check it out!
Step 1: Prepare the Area
First of all, get your safety gear so that you can protect your eyes, nose, and mouth. Also, pick up an open place to work with because the drilling process will create too much dust. Keep a rug beside so that you can clean it up any time. You have to start working in a stable place so that while you work, the equipment and your workpiece do not move.
Go for a stable and firm surface like the worktables and place the drawer there. Now, check the top left part of your drawer. Get the left front mounting bracket on your hands and all you have to do is place it on it. In this case, you have to make sure that it is exactly against the front and left side of the drawer box. Once you are done, you must go through the mounting screws.
Get the brackets and attach them. Ensure that the side and the front part of the drawer box are secured properly. When you have done the work of the left portion, move to the right mounting bracket. Repeat the same procedure there to ensure the secured position.
Step 2: Measure and Mark
Now that you are done with placing the mounting brackets, you have to start the measurement part. In this case, you will need a tape to measure the length, height and width. First, go through the width of the slide and measure it. Don’t forget to keep notes because otherwise, you will forget the accurate measurement.
After this, you must start at the lower left corner of the drawer box and measure till the top edge of the back part. Here, you will need a combination square. Point it out with the help of a pencil and then, all you have to do is enlarge this mark to make the work easier for you. Take the mark to the back of the drawer box.
The common distance from the bottom edge of the box to the lower part is about 1.5 inches. Check the measurement on right and left both sides. Here, position the square along the left edge of the drawer back. Make sure that the line is parallel to the bottom part. In this point, you will see a notch. Go through the right drawer slide and ensure the same procedure you used for the left one.
Step 3: Cutting and Drilling
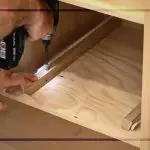
After you have been through both right and left drawers, you will find two different notches. Now, all you are going to do is cut them up! For cutting it, jigsaw can be an amazing option to settle for. Check the back notch and front bracket of the drawer and position the left slide exactly at the middle. Here, you have to search for the pinhole location.
Get your hands on the right slide and search the pinhole. Now don’t wait, mark and drill! Pick up a quarter-inch bit and start drilling this point. This is time when you must get the level and place it on the drawer opening. Make sure that you distant the bottom-left part of the drawer to the opening distance. In this case, you have to move the back edge of the level too so that you can adjust it properly.
Also, keep in mind that you have to check the two lines and keep the bubble in between. You have to mark a point on carcass back. For this, you can rely on the bottom edge as your guide. Repeat the same procedure for the carcass’s right side too!
Step 4: Add the Brackets
This is time you have to add the bracket once again! Position the mounting bracket and secure it with the screws. To get the right position, check the marks that you have created, they will guide you. First, you have to take the left slide and place it into the carcass. Start pushing it. After a while, you will see that it has reached the tab of the mounting bracket. Now, create the connection between the side of the drawer and the left edge. Add the mounting screws there. Just like you always do, repeat for the right-side drawer too!
Step 5: Check the Operation
Once you have added the mounting brackets properly, you are almost done! Take the drawer on your hands and position it inside the carcass. When you will forward the left drawer, you will see that it will click when it gets inside the front mounting bracket! While you are doing it, you have to keep in mind that there is a pin on the back of the drawer.
The pin will insert the hole that is drilled at the back of the drawer. All you need to certify is the pin gets into the hole properly. Now, you have to repeat the same thing for the right-side drawer slide! Here, get the cabinet pulls and add them up so that you an open and close them easily When you are done, you have to take the drawer out once again and get it in.
This is to ensure that the drawer slide is properly inserted or not. It the drawer goes in and out without any additional force and runs smooth, your work is done. You are ready to enjoy the drawer slides in your cabinets!
Wrap Up
We know how tough it is to install drawer slides on face frame cabinets when you are a newbie! But never worry about this because we are here to make the installation process easier than before! Follow the procedure; we bring the easiest methods to you!
Don’t forget to skim through our site. If you are a DIY-lover, you will love how we arrange all the DIY complication and address them with equal importance! Till then, stay tuned!


